
As a balloon designer turned blogger… this is one of my favorite topics to discuss! It’s also a question I’m asked pretty regularly in my local community. Here’s where I break down how to make a professional looking balloon garland at home!
Purchase balloons intentionally
I love a high quality balloon garland kit from Amazon or Etsy. They are super convenient and there are lots of really fantastic options out there. If you want to purchase balloons like a pro, you’re going to want to really review what the end result will look like. Why? Because, filters, y’all.
I can’t even begin to tell you how many times I’ve been catfished by latex. It’s the silliest, most devastating thing to happen to a balloon artist. Be sure to look at customer’s reviews that include photos of balloon garland kits inflated that you’re considering using– before purchasing.
Make sure the arrival date for your balloons is at least 1 week before the party date. Balloon garlands last for weeks, sometimes months. Especially if you order from a high quality balloon supplier like qualatex or tuftex.
How many balloons do I need?
This answer depends on the size balloons you’re using and how long you want your garland to be!
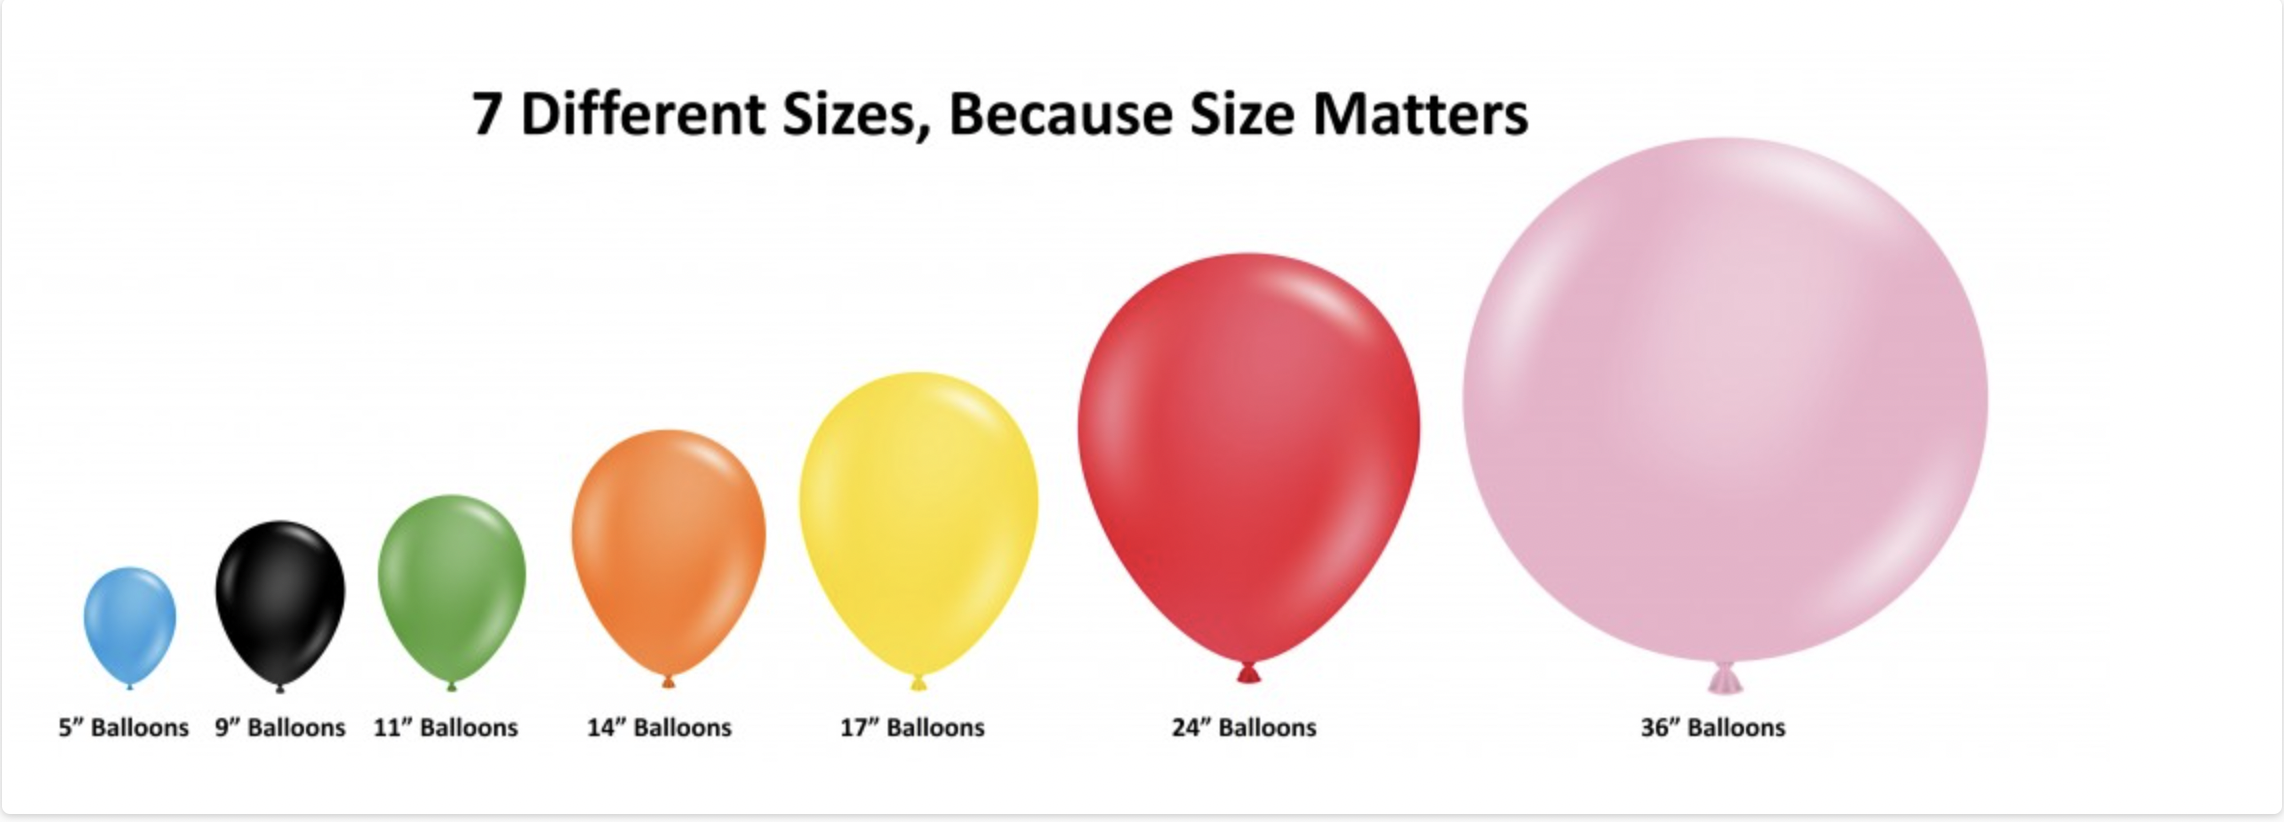
Balloon size variations are typically, 5″ balloons, 7-9″ balloons, 11-12″ balloons, 18″ balloons, 24″ balloons and 36″ balloons. Here’s what Tuftex shares regarding balloon sizes:
I like to make the base of my balloons garlands using quads (series of 4) with 11-12″ balloons. This makes my mental math a lot easier, because I consider 1 quad of 11-12″ balloons to be roughly 1 foot length-wise. Once I’ve added lots of extras, the garland gets a bit longer AND fuller. When you’re working with balloons, bigger is typically better.
Prepare the setup space
Ok. You’ve purchased the balloons that you’re going to use. You have a week, or longer, to assemble this garland before your party. But there’s a bajillion pieces and it’s all really overwhelming. Start with what’s first. Setup your space.
- Grab your double headed balloon pump. I recommend this balloon pump on amazon.
- Clean the floors and surfaces that your balloons will touch. Dog fur and sand makes balloons pop. Popping balloons are loud & disorienting for basically everyone… except my infant who made thousands of feet of balloon garlands in utero with me.
- Have at least 3 long skinny balloons (like they use to make balloon animals) set to the side. If they don’t come in your kit, purchase them at a local store. These will be the base of your garland.
- Remove the items you don’t need: the balloon tie tool, hand air pumps, command hooks, extra string, glue dots, garland tape (the plastic strip with little holes in it) to clear your space.
- Grab the collection of balloons and take a deep breath.
Organize the balloons

You can quickly organize your garland and make sure all of the supplies are in the kit before you begin.
- Separate the balloons by size AND color to make the inflation process as efficient as possible. This minute at the beginning saves you a lot of time and frustration when you’re blowing things up.
- I recommend at least 3 balloon sizes from 5″ to 24″ for dimension when building a professional looking garland.
- If you have mylar, specialty, or foil balloons set those to the side to inflate last. There’s a special trick to inflating balloons with a valve.
Start inflating
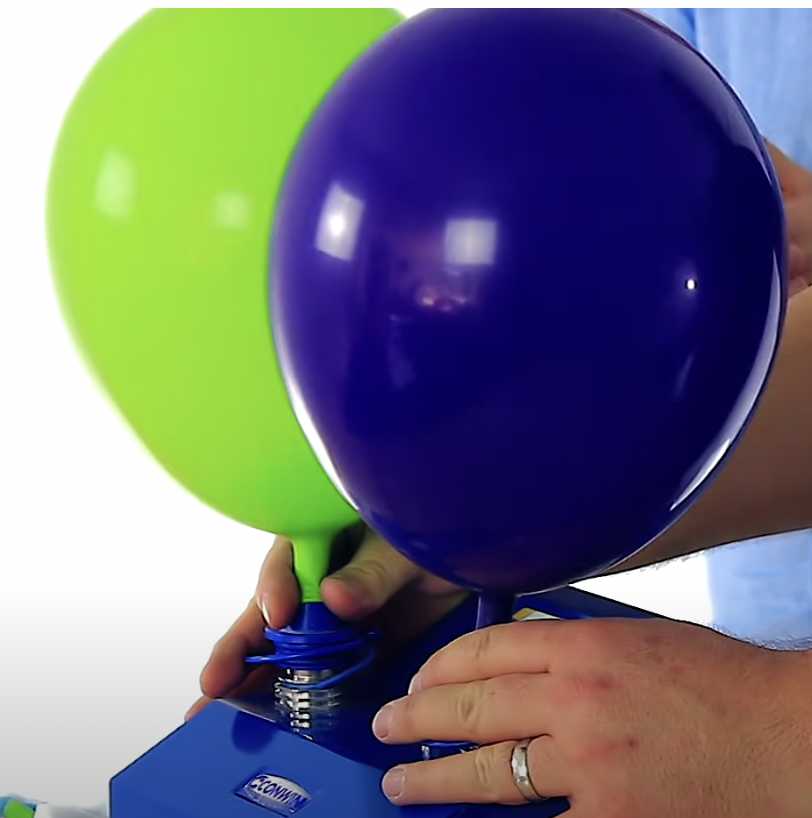
- Make your base! Take the 10″ or 12″ / medium sized balloons and inflate them first. Place a balloon opening on each hole of the double pump to air them up at the same time:
- Once inflated, deflate until the balloons are round. This makes them more resilient when they are stretched and returned to a round shape. Also, garlands tend to look better with round orbs as opposed to egg shaped balloons.
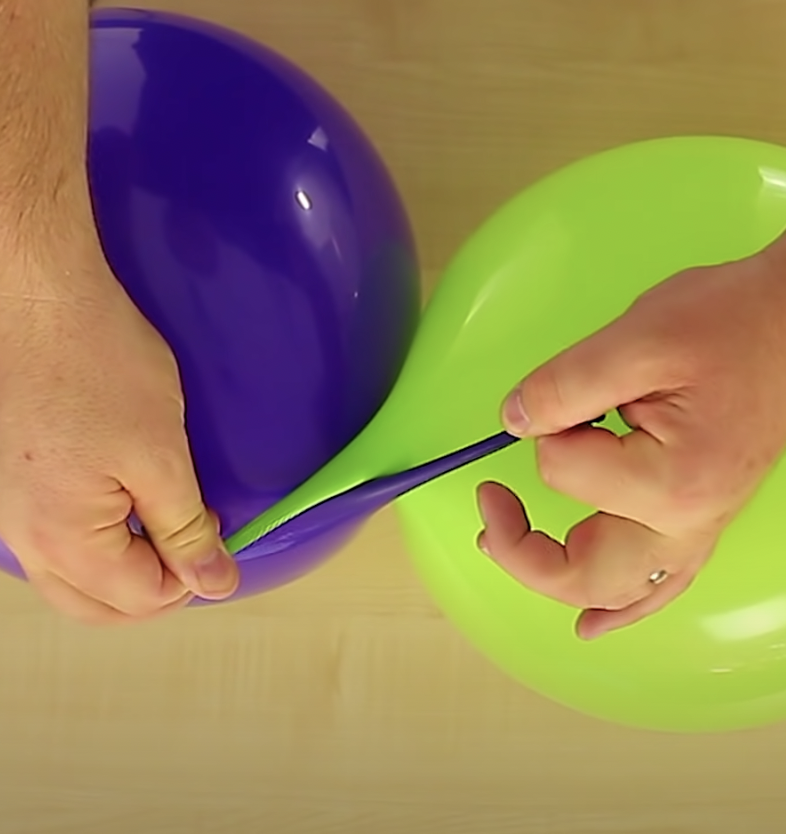
- Tie the 2 balloons together at the balloon tongue- this saves your hands a lot of work:
- After you’ve blown up all of the medium sized balloons into groups of two, twist the sets of two balloons in a figure eight motion to create quads (groups of 4).
- Repeat the process with smaller 5″ or 9″ balloons. You can also make triples (groups of 3 balloons) for dimension, based on how the math works for your balloon supply.
- Inflate larger 18″ 24″ or 36″ balloons in groups of two or singles.
Assemble the balloon garland
- Take the long, stringy balloon animal balloon and double knot it at the center tongue of the first mid-sized quads you want at the end of the garland.
- Figure eight the long stringy balloon around the mid sized quads and larger doubles to pull your garland together. This gives the garland extra stretch and malleability for when you get to hanging it later.
- Tie a double knot at the other end of the garland in the center tongue of the last quad or double that you want on your garland.
- Add smaller balloons:
- using glue dots to add width (these are less secure)
- tying to the central line to extend the garland length-wise)
- tying to the balloon tongues of the mid sized base to create dimension (this is a happy medium size-wise)
After that…. you’re done! You’ve assembled a balloon garland! Now it’s time to choose a strategic location to hang your balloon garland. Once you’ve picked your location, you’ll hang your garland using the supplies needed to hang it in that location based on material & air conditions. Here’s an article where I break down how to hang decor, with a few examples.
How long do balloon garlands last?
When assembled properly, balloon garlands last for weeks- sometimes months!
When should I make my balloon garland for my event?
Consider how you’re storing the garland. I highly recommend completing your balloon garland at least 2-3 days before the party if storage capacity permits.
How do I transport my balloon garland?
I highly recommend using a medium to large sized SUV. It feels a lot like a clown car. Make sure there’s as little sand & pet hair in the car as possible. Bonus points if you can move it in a clean enclosed trailer for larger garlands.
How do I hang my balloon garland?
That depends on the surface that you’re hanging from. Check out my article here that explains what works on different surfaces. Please note: the weather (humidity, heat & wind) will play a role in hanging limitations.
My garland came in with the wrong colors, what do I do?
For extreme last-minute measures only: there’s a process called double stuffing balloons. Basically, you layer balloons using a pencil with extra balloon colors you can find locally until you create your desired color. You’d be surprised what double stuffing darker or off-hue balloons into a white balloon will do for both the quality and color of the inflated result.
When I place the balloon on the pump, it doesn’t inflate… what now?
This is a sign of high quality, thick latex! Or tiny balloons. Pinch the top of the balloon and pull while pressing down on the balloon pump’s inflation. It will eventually catch and inflate once you stretch it out enough.
What do I do if my garland is too big for my car?
Disassemble the garland into 5-6 foot pieces. Even sedans are made to hold five humans without a trunk. Once you’ve broken the garland into these smaller pieces, place them vertically like you’d seat humans in the car. I’ve been able to transport at least 12-18 feet of garland in a sedan when I break it up like that. Remove larger 24″ and 36″ balloons to stuff elsewhere or in the trunk… or wait to inflate those on site.
Side note: this site is called easiest party ever for a reason. I highly recommend ditching the DIY and hiring a balloon professional to assemble + install your balloon garland if that’s remotely feasible within your budget. 🙂